
Hey there, nail enthusiasts! Ever found yourself in a pickle, staring at your gorgeous acrylic nails and thinking, “Hmm, it’s time for these babies to go, but a salon visit is just not on the cards right now”? Well, you’re in luck!
Today, we’re diving into the nitty-gritty of how to remove acrylic nails at home using—wait for it—dental floss! Yep, you read that right. Dental floss isn’t just for keeping those pearly whites clean; it’s a DIY nail care hero in disguise.
Why Dental Floss?
Now, why would you want to use dental floss for this seemingly delicate operation?
For starters, it’s cheap as chips. No need to break the bank on acetone or make a beeline for the nail technician.
Plus, it’s a method that’s less damaging to your natural nails compared to the harsh chemicals found in acetone. It’s like the MacGyver of nail care—resourceful, effective, and surprisingly gentle.
Here’s a sneak peek into the steps involved:
- Trim and file your acrylics.
- Pry up the edge of the acrylic nail.
- Saw off the acrylic using dental floss.
- Clean and moisturize your now-free natural nails.
- Sounds simple, right? Well, it is, but there’s a catch.
A Word of Caution!
Before we jump into the deep end, let’s slap on a quick disclaimer. This method may not be everyone’s cup of tea. If your acrylics are thicker than a bowl of oatmeal or you have sensitive natural nails underneath, it’s best to consult a professional nail technician. Safety first, glam second!
Alright, that’s the lowdown on using dental floss to remove acrylic nails at home. Stay tuned for the full play-by-play on how to execute this simple task like a pro. And hey, don’t forget to drop your thoughts, questions, or even your own unique artificial nail paints experiences in the comments below. We’re all ears!
What You Will Need
Alright, let’s get down to brass tacks. Before you go all Indiana Jones on your acrylics, you’ll need some trusty tools by your side. No, you don’t need a treasure map, but you’ll need a few household items that are probably already lurking in your drawers.
The Essentials
- Nail Clippers: These bad boys are your first line of defense. You’ll need them to trim down the acrylics so you’re not wrestling with talons. The smaller the acrylic, the easier the removal.
- Nail File or Buffer: This isn’t just for making your nails look pretty; it’s the unsung hero that’ll help you create a rough surface for the dental floss to slide under. Think of it as the sandpaper for your mini construction project.
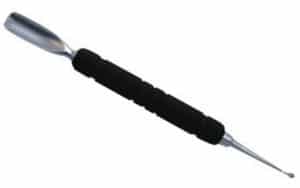
- Cuticle Stick or Orange Stick: This is your prying pal. You’ll use it to lift the edge of the acrylic nail, making room for the dental floss to do its thing. Opt for a firm cuticle stick for best results.
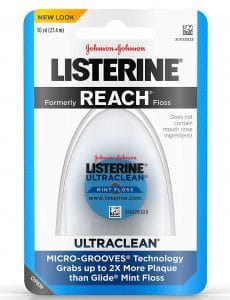
- Dental Floss or Dental Foss Pick: The star of the show! Make sure you have a good amount of it, and if you’re using dental floss picks, ensure they’re sturdy enough for the job.
- Petroleum Jelly or Moisturizer: Your skin and cuticles will thank you for this. It’s like giving your hands a mini spa day after all the hard work.
- Nail Polish Remover and Cotton Pads (Optional): This is for the clean-up crew. If you have any extra acrylic deposit or stubborn nail polish hanging around, these will help you wipe the slate clean.
Bonus Items
- Argan Oil: This liquid gold isn’t just for your hair. A few drops can work wonders in nourishing your natural nails post-removal.
- Electric Nail Filer: If you’re feeling a bit tech-savvy and want to speed up the filing process, this gadget can be a real game-changer. Just be cautious not to go overboard and damage your natural nails.
- Cuticle Cream: For that extra TLC, a good cuticle cream can help hydrate nails and keep those cuticles in tip-top shape.
- A Partner or Friend: While not a ‘tool’ per se, having someone to assist you can make the sawing motion and the whole process a lot smoother. It’s like having a sidekick in your superhero movie!
So, there you have it! Your shopping list for freeing your natural nails from their acrylic overlords. Make sure you’ve got all your ducks in a row before you start, and you’ll be on the fast track to nail nirvana.
Recommended Supplies for this Method
1. Dental Floss
2. Cuticle stick
3. Nail Oil
Step by step guide to take off acrylic nails using dental floss
Step 1: Trim and File Your Acrylic Nails
Okay, folks, it’s go-time! You’ve got your toolkit ready, your game face on, and you’re raring to reclaim your natural nails.
But hold your horses! Before we bring in the dental floss cavalry, there’s some prep work to be done. So, let’s jump right into the first step: trimming and filing those acrylic.
Snip, Snip: The Art of Trimming
First up, grab those nail clippers. Your mission, should you choose to accept it, is to trim down the acrylic nails as much as possible without turning this into a horror movie. That means, for the love of all things shiny, do not cut your natural nail bed!
Aim to leave just a smidgen of acrylic; think of it as the crust of a pie that you’ll be eating away at later.
File Away, But Not Your Natural Nails!
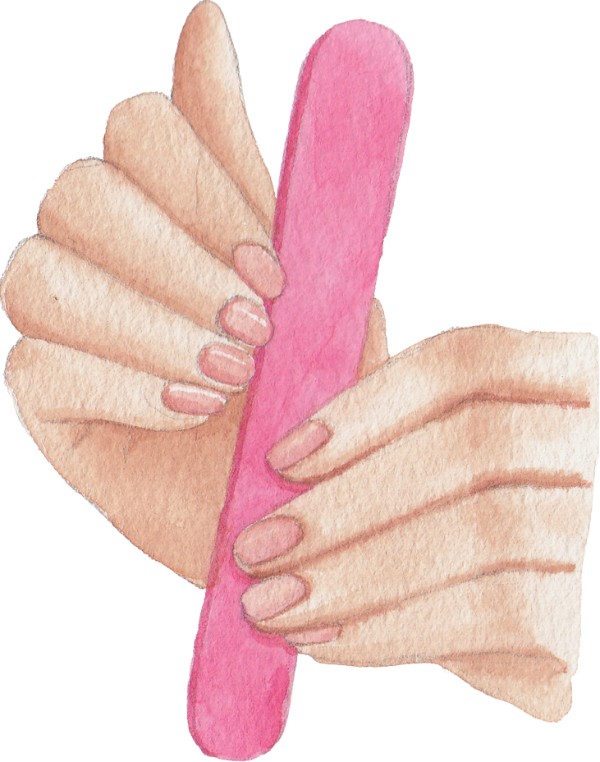
Once you’ve snipped off the tips, it’s time to bring in the nail file or buffer. You’re going to use this to remove the topcoat and any nail polish that’s still clinging on for dear life.
Create a rough surface that’ll make it easier for the dental floss to slide under. But here’s the kicker: be gentle. You don’t want to file away your natural nails or turn this into a painful removal ordeal.
Pro Tip: If you have an electric nail filer, this is its moment to shine. Just be sure to use it on a low setting to avoid filing nails down to the quick.
Safety First!
While you’re filing away, keep an eye on your natural nails. The last thing you want is to damage them in your quest for acrylic freedom. If you notice any discomfort or see that you’re getting too close to the natural nail, pump the brakes and reevaluate.
Extra Nuggets of Wisdom
- Filing Direction: Always file in one direction to minimize nail damage. It’s like petting a cat; go against the grain, and you’re asking for trouble.
- Hydrate: After you’ve filed, it’s not a bad idea to apply a dab of moisturizer around your cuticles. It’s like giving them a sip of water before the big race.
- Check Twice, File Once: Before moving on to the next step, double-check to make sure you’ve filed enough to create a good surface for the dental floss. It’s better to be safe than sorry!
Step 2: Pry Up the Edge of the Acrylic Nail
Alright, you’ve made it past the first hurdle, and your nails are looking, well, a bit rough around the edges—but that’s a good thing!
Now, it’s time to get a little sneaky. We’re going to pry up the edge of the acrylic nail, kind of like lifting the lid off a treasure chest, but without the gold doubloons. So, let’s get to it!
The Cuticle Stick: Your Mini Crowbar

Grab that cuticle stick or orange stick—this is its moment in the spotlight. You’re going to use this little tool to gently lift the edge of the acrylic nail away from your natural nail.
Think of it as your mini crowbar, prying up ends and creating a small gap. If your cuticle stick is on the firmer side, even better; it’ll give you the leverage you need.
Dental Floss: The Main Attraction
Once you’ve got that edge lifted, it’s time for the dental floss to make its grand entrance. Slip a piece of dental floss or a dental floss pick under the lifted edge. Make sure it’s long enough to wrap around your finger for a good grip. This is where things get real, folks.
Safety First, Again!
Now, I can’t stress this enough: be gentle. You don’t want to turn this into a scene from a slasher film. If you feel any pain or resistance, stop and reassess. The goal is to avoid injuring your natural nail or the skin around it.
Extra Tips for the Win
- Angle Matters: When inserting the dental floss, try to keep it as flat as possible against your natural nail. This minimizes the risk of digging into your skin or nail bed.
- Double-Check: Before you proceed, make sure the dental floss is securely in place and that you’ve got a good grip. You don’t want it slipping mid-saw.
- Partner Assistance: If you’ve got a buddy around, now’s the time to recruit them. Having an extra pair of hands can make the upcoming sawing motion a breeze.
Step 3: Saw Off the Acrylic Nail with Dental Floss
Buckle up, buttercup! You’ve made it to the main event. This is where the magic happens—or should I say, the sawing.
The Sawing Symphony
First things first, you’re going to need a partner in crime for this step. Why? Because you’ll need someone to hold both ends of the dental floss and move it in a back and forth motion under the acrylic nail. Think of it as a mini tug-of-war, but instead of pulling, you’re sawing.
Gentle Pressure, Steady Speed
Now, the trick here is to apply gentle pressure while moving the floss back and forth. You’re not trying to cut through wood here, so no need to go full lumberjack on it.

A steady, rhythmic motion should do the trick. Before you know it, you’ll feel the acrylic nail starting to give way. It’s like that moment when you finally loosen a stubborn jar lid—pure bliss!
One Down, Nine to Go
Once the acrylic nail pops off or slides off (cue the Hallelujah chorus), give yourself a mini round of applause. But don’t get too carried away; you’ve got more nails to go. Repeat the process for each finger until you’re acrylic-free and feeling fabulous.
Extra Juicy Tips
- Slack Acrylics: If the acrylic doesn’t pop off immediately, don’t force it. Give it a little wiggle to loosen any extra acrylic deposit that might be holding on for dear life.
- Safety Check: If at any point it feels painful or like you’re about to rip something other than the acrylic, hit the pause button. Reassess and maybe even go back to Step 2 for a do-over.
- Celebrate Small Wins: After each successful removal, take a moment to admire your handiwork. It’s the little victories that make this whole DIY adventure worthwhile.
Step 4: Clean and Moisturise Your Nails
Phew! You’ve done it! Your acrylics are off, and your natural nails are breathing a sigh of relief. But wait, we’re not quite done yet.
Wipe Off the Ghosts of Acrylics Past
First on the agenda is to get rid of any lingering acrylic residue or glue. You don’t want to walk around with the ghosts of acrylics past haunting your nails, do you?
Grab some nail polish remover and cotton pads and gently wipe away any remnants. If you’ve got acetone-free nail polish remover, even better; it’s less harsh on your nails.
Hydration Nation
Your nails have been through a lot, so it’s time to hydrate, hydrate, hydrate! Slather on some petroleum jelly or your favorite moisturizer around the nails and cuticles. If you’ve got some argan oil lying around, now’s the time to use it. Your nails will drink it up like a plant in the desert.
Cuticle Care: The Cherry on Top
Don’t forget those cuticles! They’ve been your unsung heroes throughout this process. Apply a nourishing cuticle cream to keep them soft and healthy. Trust me, your cuticles will thank you.
Pro tips
- Nail Buffing: If you want to go the extra mile, use a nail buffer to make your nails smooth and shiny. It’s like putting a glossy finish on a masterpiece.
- Nail Strengthener: Consider applying a nail-strengthening cream or oil. Your nails have been through the wringer, and they could use a little reinforcement.
- Avoid Harsh Chemicals: For the next few days, try to steer clear of harsh cleaning agents or anything that could weaken your newly liberated nails.
- Test the Waters: Before diving back into the world of nail art or gel nails, give your natural nails some time to recover. Think of it as a nail-cation!
Conclusion
Well, well, well, look at you—a DIY nail technician in the making! You’ve navigated the labyrinth of acrylic removal and come out the other side with natural nails that are ready to take on the world. Or at least, ready to take on a new coat of polish.
The Dental Floss Victory Lap
Let’s take a moment to give a shout out to dental floss, the unsung hero of this tale. Who knew that the same stuff you use to keep your pearly whites sparkling could also free your nails from acrylic tyranny? It’s cheap, it’s easy, and best of all, it’s less damaging than using acetone. Talk about a triple threat!
The Road Ahead: Nail Care 101
Now that you’ve reclaimed your natural nails, it’s time to show them some love. Avoid harsh chemicals like the plague, keep them trimmed and filed, and maybe even apply a base coat before you go all Picasso with your next nail art adventure.
Extra Nuggets of Wisdom
- Regular Maintenance: Keep up with regular filing and moisturising. Your nails are like pets; they need constant care.
- Consult the Pros: If you’re thinking of another round of nail enhancements or extensions, maybe consult a nail technician first. They can offer advice tailored to your nail health.
- Feedback Fiesta: Got questions, comments, or your own acrylic removal saga to share? Spill the tea in the comments section below. We’re all ears!
So, there you have it, the A to Z, or should I say, the acrylic to zilch guide on how to remove acrylic nails with dental floss.
Till next time, keep those nails happy and that floss handy!
Do’s an Don’ts
Do’s:
- Prep Work: Before you even touch that dental floss, make sure to clip your acrylic nails as short as possible. It’s like setting the stage, you know?
- Team Up: This isn’t a solo mission. Get a friend to help you out. Trust me, you’ll need an extra pair of hands.
- Lift the Edges: Use an orange stick or a cuticle pusher to gently lift the edges of the acrylic nails. It’s like peeking under the rug before you pull it out.
- Floss Away: Slide the dental floss under the lifted edge and see-saw it back and forth. It’s almost like you’re flossing your teeth, but not quite.
- Go Slow: Patience is key. Don’t rush; otherwise, you’ll end up damaging your natural nails. Slow and steady wins the race.
- Moisturise: After the acrylic is off, slather on some cuticle oil or lotion. Your nails have been through a lot; they deserve some TLC.
Don’ts:
- Force It: If the acrylic nail isn’t budging, don’t force it. You don’t want to end up in a “nail-tastrophe.”
- Skip Safety: Always make sure you’re in a well-ventilated area. You’re dealing with chemicals here, not just beauty products.
- Reuse Floss: One strand of dental floss per nail, please. It’s not a spaghetti strand you can twirl around multiple times.
- Ignore Pain: If it hurts, stop right there. No beauty ritual should feel like a torture chamber.
- Neglect Aftercare: Don’t forget to wash your hands thoroughly and apply antiseptic. Safety first, darling!
VIDEO HELP
You can watch a girl using the same method by herself. Yes that looks painful!! But you can get some idea how this works.