
Are you wondering how to remove acrylic nails with acetone safely? Look no further! We have put together a comprehensive guide to help you through the process.
Before we move ahead, let me clarify one common myth that acetone is not safe. Yes its only a myth! Actually using acetone to remove the fake nails is the best technique which won’t hurt you at all and takes off your acrylic nails precisely without hurting you.
Following are the supplies you are going to need for the procedure. Its highly recommended that you use the best supplies to avoid any possible damage.
After thorough research, I have managed to collect the following best supplies you can buy to get true value for your money.
Recommended Nail Supplies Required
- Pure Acetone Nail Polish Remover
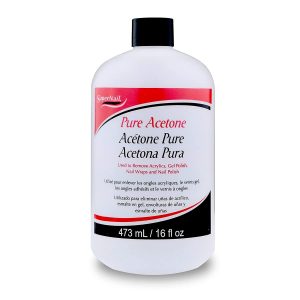
Buy larger pack (such as, 32 oz pack) of Super Nail Pure Acetone and you can save some good money.
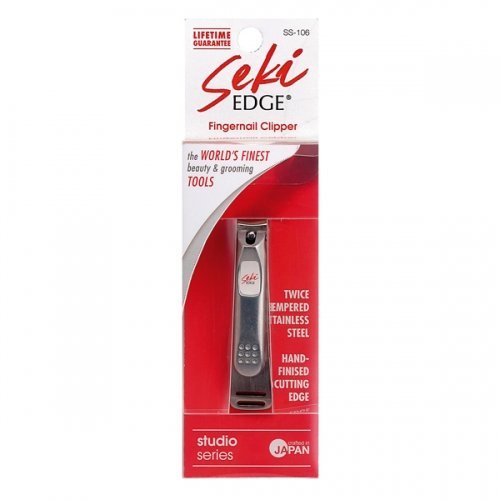
2. Nail Clipper
3. Fine Nail Buffer
4. Fine Nail File

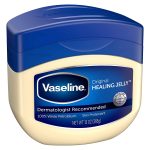
5. Petroleum Jelly
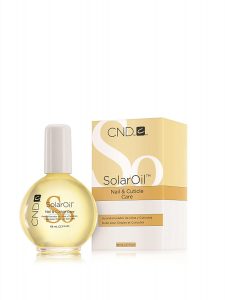
6. Nail Oil
Step by step guide to Remove Acrylic Nails at Home
1. Prepare Your Nails
Before soaking your nails in acetone, it’s important to prepare them properly. This will ensure that the removal process is effective and safe. Here are the easy steps to prepare your nails for acrylic removal:
Step 1: Clip the nails short and file away the topcoat and nail polish. This will make it easier for the acetone to penetrate and dissolve the acrylic.
Step 2: Wash your hands thoroughly to remove any dirt or oils on the nails. Dry them completely before proceeding.
Step 3: Apply a thin layer of petroleum jelly or cuticle oil around the edges of your nails. This will protect your skin from the drying effects of acetone.
If followed correctly, these steps will ensure that your nails are ready for the acrylic removal process.
Taking the time to properly prepare your nails will result in a smoother and more successful removal experience.
2. Soak Your Nails in Acetone
Now it’s time to soak your nails in acetone to loosen the acrylic. This step is crucial in the removal process as it helps break down the adhesive bond between the acrylic and your natural nails.
To do this, you’ll need to take the soaked cotton balls and wrap them around each nail, ensuring full coverage.
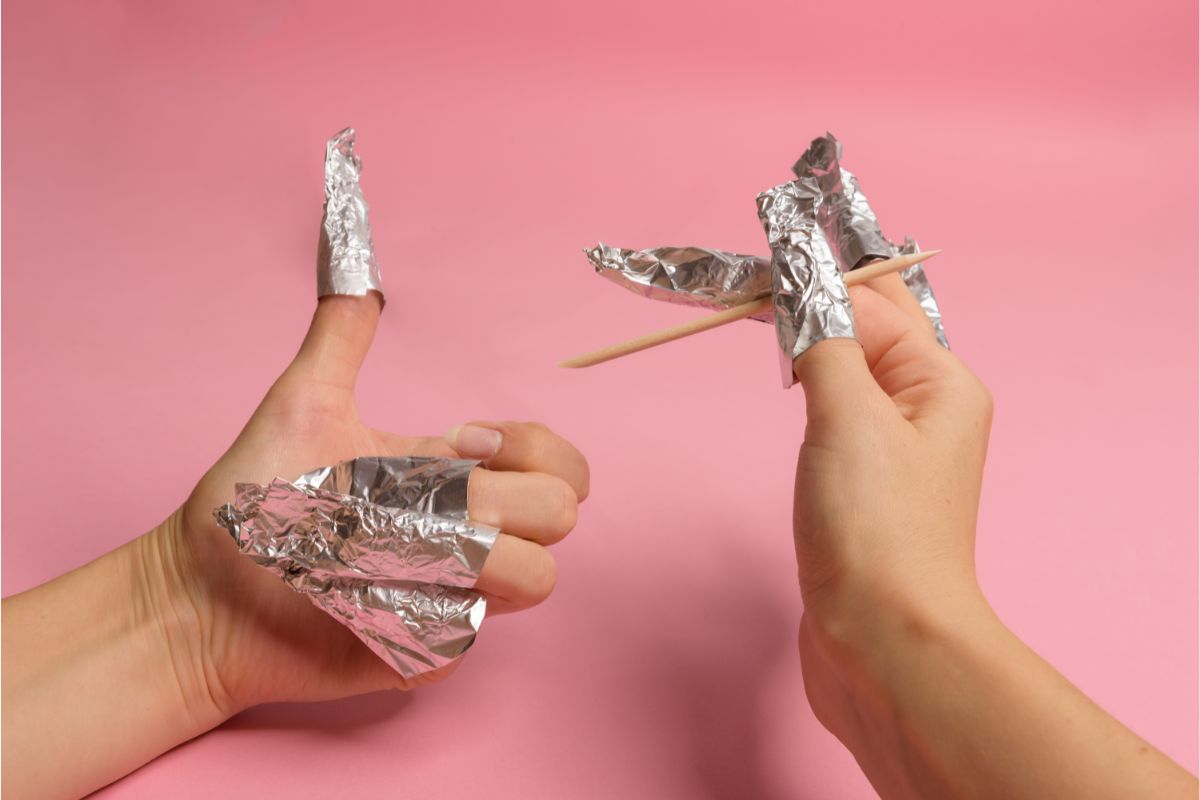
Once the cotton balls are in place, secure them by wrapping foil squares around your fingertips. This will help maintain contact with the acetone and prevent evaporation.
The foil also adds a layer of insulation, ensuring that the heat from your fingers aids the soaking process.
Leave the nails soaked for approximately 20 minutes. This allows the acetone to penetrate the acrylic, making it easier to remove.
While waiting, you can relax and pamper yourself with a good book or your favourite TV show!
Remember to keep your fingertips away from water and heat sources, as these can interfere with the soaking process.
If you want to enhance the soaking process, you can try adding a heating pad or a warm bottle to slightly heat the acetone. The gentle heat helps to speed up the reaction and loosen the acrylic nails even more effectively. However, make sure the temperature remains comfortable and not too hot.
After the 30 minutes are up, gently remove the foil squares and cotton balls, taking care not to damage your natural nails. You’ll notice that the acrylic has become softer and more pliable, making it easier to remove.
If there are any remaining bits of acrylic, use a nail filer to gently file them away. Finally, wash your hands thoroughly and moisturise your nails and cuticles with lotion or oil to replenish the moisture lost during the soaking process.
3. Soak Your Nails in Acetone
Now it’s time to soak your nails in acetone to loosen the acrylic. This step helps break down the adhesive bond between the acrylic and your natural nails. To do this, you’ll need to take the soaked cotton balls and wrap them around each nail, ensuring full coverage.
Once the cotton balls are in place, secure them by wrapping foil squares around your fingertips. This will help maintain contact with the acetone and prevent evaporation. The foil also adds a layer of insulation, ensuring that the heat from your fingers aids the soaking process.
Leave the nails soaked for approximately 30 minutes. This allows the acetone to penetrate the acrylic, making it easier to remove.
If you want to enhance the soaking process, you can try adding a heating pad or a warm bottle to slightly heat the acetone. The gentle heat helps to speed up the reaction and loosen the acrylic nails even more effectively. However, make sure the temperature remains comfortable and not too hot.
After the 30 minutes are up, gently remove the foil squares and cotton balls, taking care not to damage your natural nails. You’ll notice that the acrylic has become softer and more pliable, making it easier to remove. If there are any remaining bits of acrylic, use a nail filer to gently file them away.
Finally, wash your hands thoroughly and moisturise your nails and cuticles with lotion or oil to replenish the moisture lost during the soaking process.
4. Secure the Foil and Cotton Balls
To prevent the acetone from evaporating and to protect your nails, secure the foil and cotton balls. Here’s how to do it:
Step 1: After soaking 10 cotton balls in acetone, place one saturated cotton ball on each nail. This will help the acetone to penetrate the acrylic nails and loosen them.
Step 2: Take a foil square and wrap it tightly around your finger, securing the cotton ball in place. Repeat the process for all your nails.
Why is it important to secure the foil and cotton balls?
The foil helps to create a barrier between the acetone-soaked cotton ball and the air, preventing the acetone from evaporating quickly. This allows the acetone to effectively break down the acrylic nails.
Additionally, the foil keeps the cotton ball in place, ensuring that it stays in contact with the nails throughout the soaking process. By securing the foil and cotton balls properly, you are taking the necessary steps to protect your nails and maximise the effectiveness of the acetone.
5. Wait for the Acrylic to Loosen
Patience is key at this stage – you’ll need to wait for the acrylic to properly loosen. Soaking your nails in acetone is a gentle yet effective method for removing acrylic nails, but it takes time for the solution to work its magic. The recommended soaking time is around 30 minutes, allowing the acetone to penetrate the layers of acrylic and break down its bond with your natural nails.
Using a Timer for Precision
If you want to ensure that you soak your nails for the perfect amount of time, consider using a timer. Set it for 30 minutes and relax, knowing that you’re following the recommended duration. Remember, timing is crucial for achieving the best results, so try not to rush the process.
Removing acrylic nails can be a bit time-consuming, but it’s worth it for healthy and beautiful natural nails. So, take a deep breath, be patient, and trust the process.
6. Gently Remove the Acrylic and Shape Your Nails
It’s time to gently remove the acrylic and use a nail filer to shape your nails. After soaking your nails in acetone and waiting for the acrylic to loosen, it’s important to remove the loosened acrylic properly. Gently pull off the foil and cotton balls, and you’ll notice that the acrylic easily comes off.
However, there might be some remaining bits of acrylic that need to be removed. Use the nail filer to gently file away any remaining acrylic, ensuring that you don’t file too aggressively to avoid damaging your natural nails.
Shaping Your Nails
Once all the acrylic has been removed, it’s time to shape your nails. Use the nail filer to shape them according to your preferences. Whether you prefer rounded, square, or almond-shaped nails, its up to you.
Remember to file in one direction, moving from the side to the centre of the nail, to avoid causing any damage. By shaping your nails, you can achieve a neat and polished look.
Remember to wash your hands thoroughly to remove any remaining acetone residue, and then moisturise your hands and cuticles with lotion or oil. This will help keep your nails and skin hydrated, ensuring they remain healthy and strong.
7. Clean and Moisturise Your Nails
Now that you’ve removed the acrylic, it’s time to clean and moisturise your nails. Follow these simple steps to ensure proper nail care:
Cleanse and Dry
Start by thoroughly cleansing your nails and hands using a gentle soap or nail cleanser. Remove any residue or leftover acetone from the removal process. Pat your nails dry with a clean towel to avoid any moisture buildup.
Hydrate and Nourish
Once your nails are clean and dry, it’s important to hydrate and nourish them to prevent dryness and brittleness. Apply a cuticle oil or nail and cuticle cream to moisturise the nail bed and surrounding skin. Massage the product gently to promote blood circulation and stimulate nail growth.
Protect and Maintain
After moisturising, protect your nails by using a clear base coat or a nourishing nail strengthener. This will provide a protective barrier, preventing the nails from breaking or peeling. Apply your favourite nail polish if desired, and finish with a top coat for added shine and longevity.
That’s it. Hope you are able to safely remove acrylic nails at comfort of your home using the above guide.
Dos and Don’ts for Acrylic Nail Removal
Taking the necessary precautions will help ensure a safe and successful removal process. Here are some tips to keep in mind:
Do:
1. Clip the nails short and file away the topcoat and nail polish: Trimming your nails and removing any polish or topcoat will make the removal process easier.
2. Soak 10 cotton balls in acetone and place them on each nail: Acetone is the most effective solution for removing acrylic nails. Soaking cotton balls in acetone and placing them on each nail will help to soften and dissolve the acrylic.
3. Secure the cotton balls with foil squares: Wrapping each finger with a foil square will help to keep the acetone-soaked cotton balls in place, allowing for a more effective removal.
Don’t:
1. Use rubbing alcohol, dish soap, or hot water: These methods are not effective in removing acrylic nails and can cause damage to your natural nails.
2. Forcefully pry off the acrylic nails: Pulling or prying off the acrylic nails can cause damage and pain. It’s important to be patient and let the acetone do its job of loosening the acrylic.
3. Skip the moisturising step: After removing the acrylic nails, it’s essential to hydrate and nourish your nails and cuticles. Use cuticle oil and moisturise your hands to keep them healthy and beautiful.
By following these dos and don’ts, you can safely remove your acrylic nails without causing harm to your natural nails. Remember to take your time and be gentle throughout the process. If you have any concerns or questions, consult a professional nail technician for further guidance.
Conclusion: Safely Remove Acrylic Nails with Acetone
Remember, there are alternative methods to remove acrylic nails, such as using dental floss or an acetone-free nail polish remover. However, following the steps outlined above will ensure a safe and effective removal process.
Now that you have the necessary information, confidently proceed with removing your acrylic nails. Enjoy the feeling of fresh, natural nails and the ability to switch up your manicure whenever you please!
Video Help
The following video has exactly the same procedure but performed by a professional at nails salon. Get an idea if something is not clear. The technique is basically the same but they just use professional tools and our guide is focused towards “Do it yourself at home” approach.
Can I remove acrylic nails at home?
Absolutely! With the right supplies and proper technique, you can safely remove acrylic nails in the comfort of your own home.
Just make sure to follow the step-by-step instructions provided, and you’ll be able to take off your acrylic nails without damaging your natural nails.
How long does it take to remove acrylic nails with acetone?
The process of removing acrylic nails with acetone can take approximately 30 minutes. It’s important to allow enough time for the acetone to effectively dissolve the acrylic, making it easier to remove. Patience is key during this process, as rushing could potentially damage your natural nails.
What other methods can I try to remove acrylic nails?
If you prefer alternative methods, there are a few options you can consider.
Some people find success in using dental floss to loosen the acrylic nail and gently slide it off.
Another option is to soak your nails in acetone without wrapping them in foil for 20-30 minutes.
Additionally, some nail polish removers that are acetone-free can also be used to gently pry off the acrylics.
Remember to always follow proper technique and take caution to avoid damage to your natural nails.
Hey
thanks a lot. just absolutely brilliant article.
I never read so informative article ever.
keep writing plz. i am now following your blog daily.
wowww