
Getting fake nails using acrylic is definitely one of the best gifts of nail art. However, once you have those beautiful acrylic nails, you will also need to maintain them regularly, just like any other good thing out there.
The most common maintenance activity for acrylic nails is to have the regular infills. As your nails will grow out after initial acrylic nails application, an infill would be required in 2 to 3 weeks to bring the grown out part at par with rest of the nail.
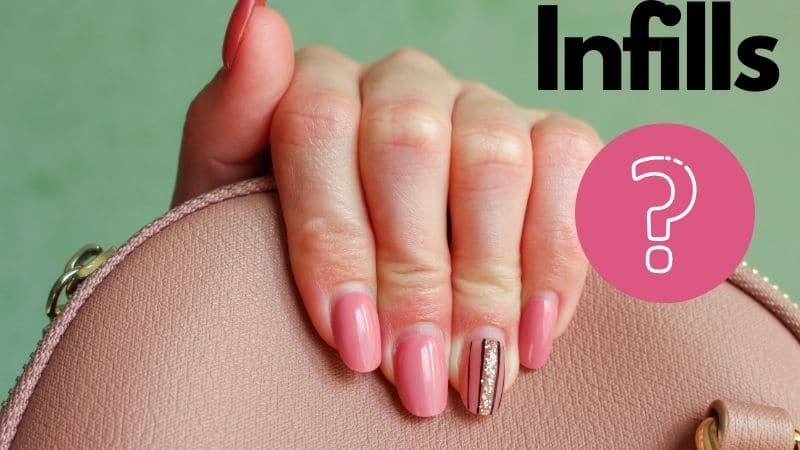
What is acrylic refill or infills?
Once you get fresh set of acrylics, it is obvious that your nails will continue to grow and thus in few weeks, outgrown part of your nail would not be covered with acrylic and nail paint.
You should not consider that as end of your existing acrylic nails set. There is no need to completely replace outgrown nails with fresh sets or taking them off. Instead, you can have nail refills multiple times before discarding or replacing the whole set of fake nails.
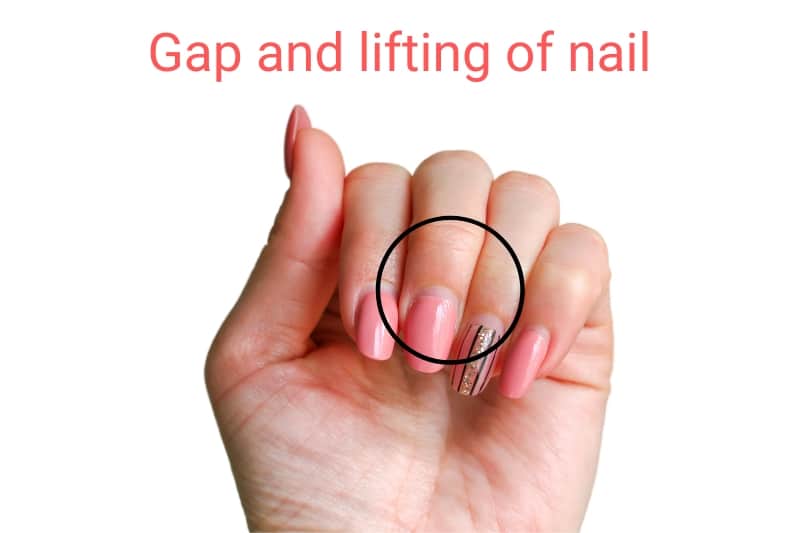
An infill for acrylic nails would be required for two major reasons:
- Gap between acrylic and cuticle: As your nail grows after acrylics application over 2 to 3 weeks, you will notice gap towards the bottom (between cuticle and acrylic nail or nail paint).
- Lifting of acrylic: During application of acrylic nails, the entire nail towards lower cuticle is covered and sealed with acrylic. As the nail grows, you will notice a dip or cliff like structure in the gap between your cuticle and acrylic nail. The dip would depend upon thickness of acrylic used on your nail. If you did not smooth out the acrylic thickness with cuticle initially, then dip would be more prominent across the gap.
The gap between cuticle and acrylic nail coupled with dip is definitely not a pleasing sight. Most likely, the unappealing sight of this gap will attract more attention than the beauty of your nail art and thus require a fix.
The gap between cuticle and acrylic nail edge can be filled without replacing the whole set and this process is called acrylic refill or nail infill. This will also fix any lifting of acrylic caused due to natural nail growth. The result of refill would be a nail covered completely with acrylic and nail paint just like a new acrylics set without actually replacing the old acrylics set.
Refills would not only save your time in fixing the nail growth gaps, it is a very convenient and budget friendly approach to have acrylics for a long duration. The time and cost involved in acrylic refills is much lower than removing the old acrylics and doing a fresh application. This is what “fill in” means as a service provided by nail salons.
Refill process is easy and can conveniently be done at comfort of your home following 6 easy steps. The below guide uses an easy method to fill the gap due to outgrown nail instead of a back fill method. Under back fill method, the entire existing acrylic is removed and replaced with fresh layers, which is comparatively time consuming and difficult.
Following below steps, you should be able to fill outgrown nail gap and remove lifted acrylic for quick makeover. Before you go ahead with nail infills, make sure you have nail supplies required during the process.
Supplies required to do acrylic nails fill-in at home
| Required supplies | Recommended Product |
|---|---|
| Nail File | O.P.I. Nail File |
| Nail Buffer | Flash Shiner Nail Buffer |
| Acrylic Liquid | Mia Secret Liquid Monomer |
| Acrylic Powder | Super Nail Powder |
| Non Acetone Nail Polish Remover | OPI Acetone Free Nail Polish Remover |
| Nail Primer | Sassi No Burn Primer |
| Nail dehydrator | Modelones Professional Natural Nail Prep Dehydrate |
| Acrylic Dish | Acrylic Nail Art Crystal Dish |
| Acrylic Brush | Professional Nail Brush for Acrylics |
| Nail drill (optional but highly effective for quick infill) | MelodySusie Portable Electric Nail Drill |
The critical supplies that you need is acrylic powder and liquid. Other supplies would generally be available at home or can be replaced with substitutes. While the recommended products are best in class, if you do not prefer to buy separate acrylic material and just need a small package for occasional infills, consider a nail fill kit.
KISS Acrylic Nail Fill Kit
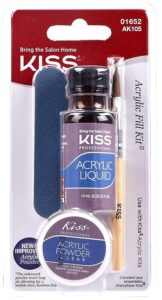
This is quite a handy acrylic nail filler kit and has all the basic material that you will need to fill acrylic nails at home. The quality of ingredients is decent and would do a fair job for your do-it-yourself nail art and filling jobs.
The kit contains a small pack of acrylic powder, acrylic liquid, nail primer, a decent nail file and brush to apply the acrylic mixture on nails. You can even use the ingredients to do a full set of acrylics and not just the infills.
The small pack of this kit has sufficient quantity of acrylic to fill the nails around 5 to 8 times, depending upon nail length. That brings down the variable cost of one acrylic nail fill session under $2 to $3 (not considering few extra cents of regular nail products such as dehydrator, nail paint).
While you may go for the above kit or similar ones, quality of professional acrylic supplies (individual products recommendation above) is much better than the kits. If you do regular nail art, it may be worth investing in professional supplies and average cost per acrylic nails set or infills would still be extremely low compared to salons.
Step by Step Guide to Fill Acrylic Nails – DIY at home
Step 1: Remove Old Nail Paint
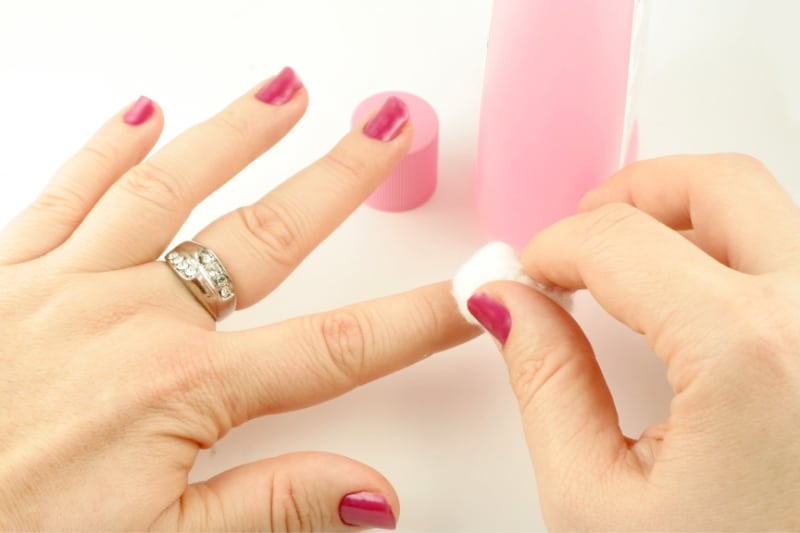
Start by removing the old nail paint. Use cotton balls soaked in Acetone Free Nail Paint Remover only for this purpose. You should not use acetone-based remover as that will dissolve the acrylics over entire nail and cause damage to the acrylic base. Since we do not want to take off acrylics but only the nail paint, so make sure you use non-acetone based nail paint remover.
Once you have removed the nail polish, clean your nails with wipe (use baby wipes, if you have them). You may also wash your hands and soak them dry but do not leave the acrylic nails in water for a long time (always better to use wipes than soaking off).
You need a clean surface before we go ahead with filling the gaps. Any leftover dust or bacteria and subsequently covered with acrylic may infect your nail bed.
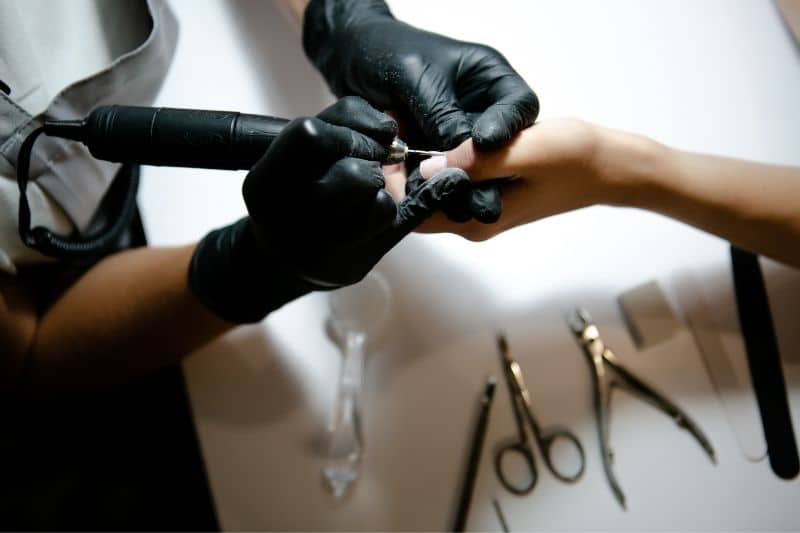
Step 2: Buffing the excess and lifted acrylic
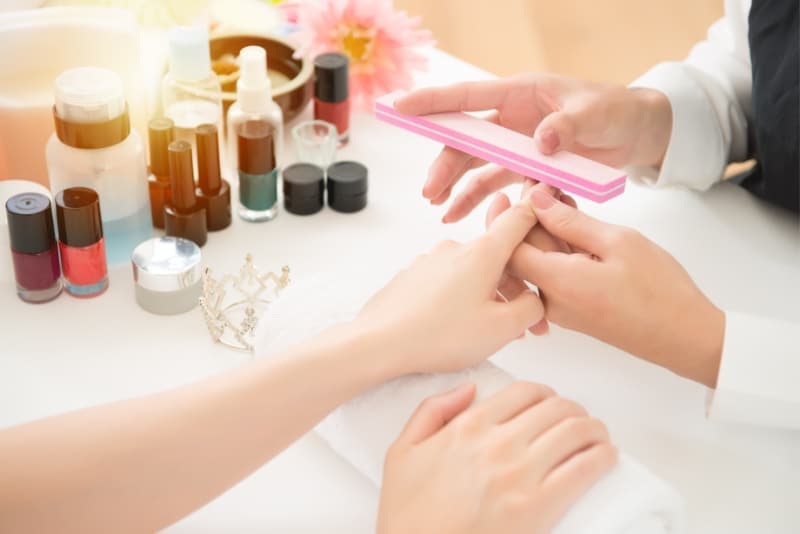
It is likely that your nail growth would have caused bottom edge of acrylic to lift up. You need to remove this lifting for a smooth acrylic nail finish, as we fill the gap with acrylic later.
Use a rough nail buffer to remove the lifted acrylic at the bottom edge. Keep buffing and switch to higher grids to form a smooth surface from edge of acrylic to the natural nail. You may initially use a 180 grit nail file and then switch to 240 grit file when they are thin. Use buffer to remove any bumps and try to achieve as much smooth base as you can.
Warning: Do not use buffer on the natural nail bed or gap where there is no acrylic. Rough buffer use on natural nail can cause damage and thus should only be used for buffing and removing lifted acrylics.
If your natural nail bed is rough, use a high grit file or sponge buffer to gently buff them as well. A smooth nail bed is always better before you fill the gap with acrylic.
You may use a nail drill to quickly buff the acrylics and remove the lifting. You may use barrel shaped bit to speed up drilling process. Switching grits in the nail kit is also easier and helps in creating smooth base using a single tool.
Step 3: Using dehydrator and Nail Primer
After filing and buffing the lifted acrylics, clean your nails thoroughly and make sure there is no leftover dust.
Push up the cuticles using a cuticle pusher and take off the excess cuticle and dry or dead skin. Once excess cuticle is gone, use soft wipes to clean both the acrylic and natural nail plate before proceeding ahead.
Apply nail dehydrator on the natural nail plate as that will remove any excess oil on your nails before we apply the acrylics. Thereafter, apply a drop of nail primer using a brush on your natural nail (gap that needs filling). For better results, apply 2 to 3 coats of nail primer. Be sure that you let the previous coat dry, before you move on to the next coat.
Using primer is extremely important, as it will protect your natural nail from any harmful effects of acrylic (which contains chemicals). It acts as a protective layer between natural nail and acrylic or nail paint and thus prevent yellowing of nail or any harmful reactions.
Warning: Nail primer should be applied on your nail only. Try and avoid applying primer on skin or cuticles.
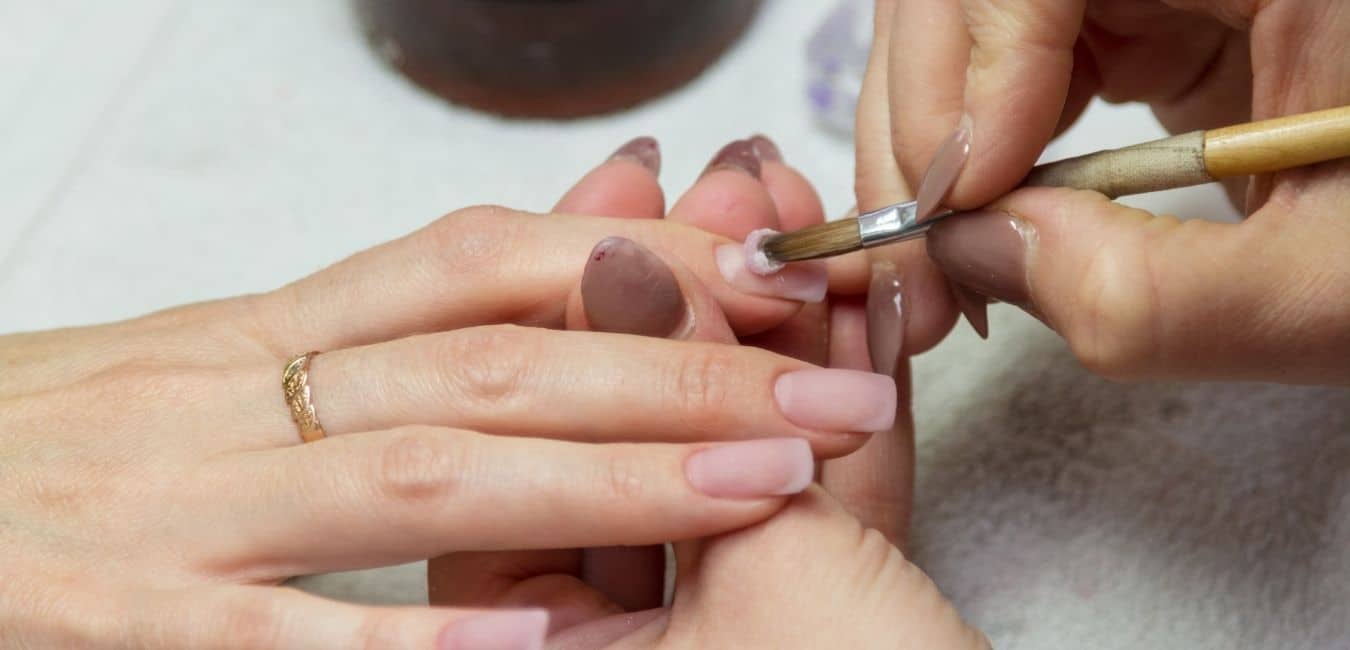
Step 4: Prepare & apply the acrylic mixture to fill gap
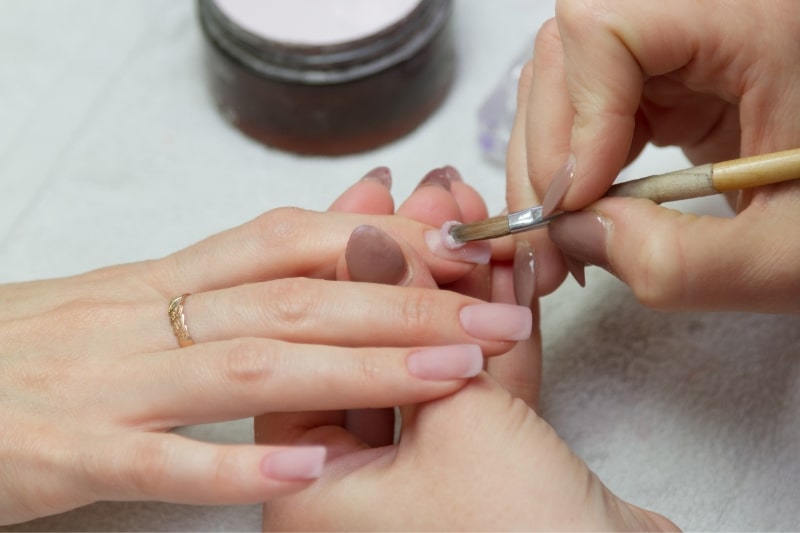
Now take a glass dish and prepare the acrylic mixture. For this, you will need to mix acrylic powder and acrylic liquid (monomer) together. You need to form a pearl like bead of acrylic mixture and take it onto the brush to file the gap. Read an easy guide on how to make the perfect bead of acrylic mixture.
Once you have the acrylic mixture bead on the brush, gently apply it on the natural nail evenly to fill the gap between cuticle and acrylic nail edge. Apply only limited quantity to even out the gap and bring it at par with acrylic nail level.
Tip: When you apply acrylic mixture bead on to fill the natural nail gap, keep your finger downwards as that will help the acrylic mixture from rolling down towards cuticle (which happens if you keep your finger straight or tilted upwards).
This will help you to easily fill the gap without flooding your cuticles. A neat and clean fill in without flooding the cuticles will also reduce lifting up of acrylic due to future nail growth.
Once the gap is filled, apply one or two coats of acrylic mixture on the full nail to create an even and smooth base for the entire nail. For this purpose, apply acrylic mixture in the middle of nail and then use the brush to spread it evenly across the entire nail. Use the sides of brush to apply the acrylic evenly across the corners and blend with existing cuticle.
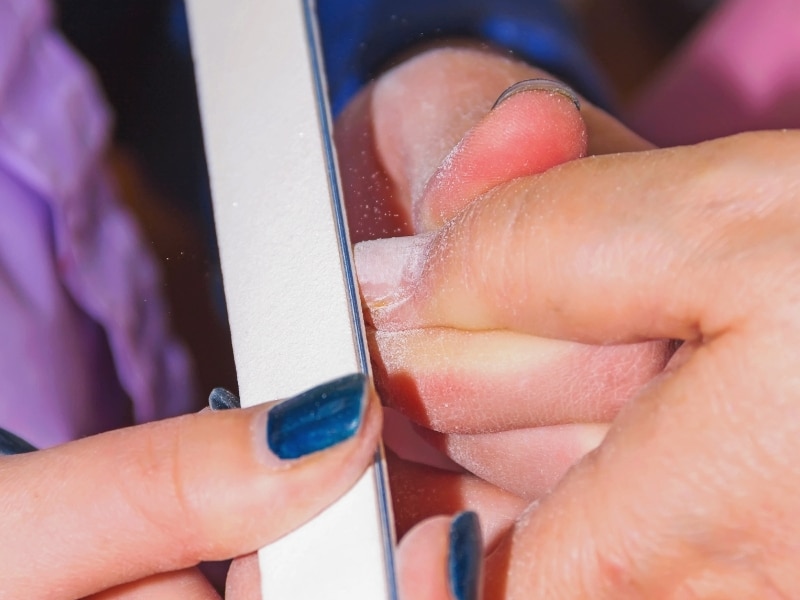
Step 5: Dry, File & Buffer
After applying the acrylic mixture, leave your hands still for few minutes and let the acrylic dry completely.
If you want, then you can file the nail to reduce the overall length as your nail grew over last 2 weeks.
Buffer the entire nail using the soft side of the nail buffer to make the overall texture smooth and shiny. Keep filing and buffing until you get the desired shape and size for the nail.
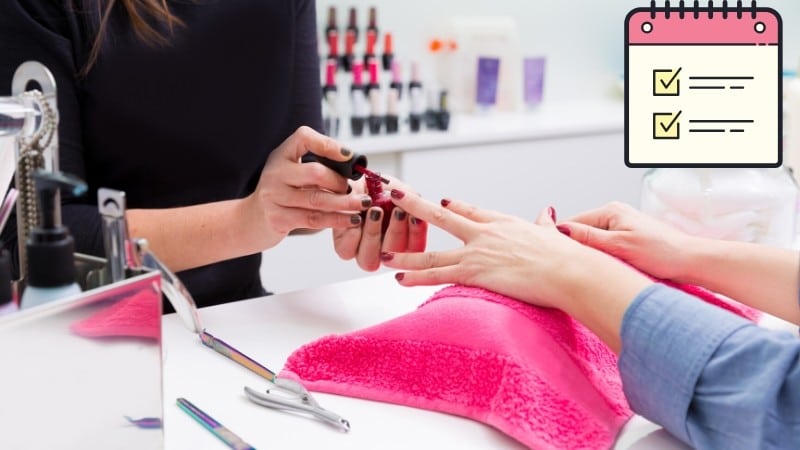
Step 6: Finally Paint the Nails
Your acrylic nails are ready and you can go ahead with painting. Use a base coat, then the main nail polish and finally the top coat to give your acrylic nails the best look.
If you need help, follow this easy guide on how to paint your acrylic nails. Make sure you use high quality supplies that are compatible for painting acrylics.
Quick video on how to fill acrylic nails yourself
That’s it. Isn’t it easy to fill in the nails yourself? There is literally no need to pay hefty charges for bi-weekly nail fills in to the salons. The above steps are even easier when done than said.
Doing acrylic nails fill in at your own is extremely easy and helps you in maintaining acrylic nail sets for a long time without burning a hole in your pocket. It’s easy to maintain acrylic nails for 4 to 5 months with in-fills every 2 to 3 weeks for outgrown nails, before you eventually replace them with fresh sets.
Cost of acrylic infill or refills

Acrylic nails infills at salons will roughly cost around 50% or two-third of price for fresh acrylic nails set. The general price at an average reputed nail salon for acrylic nail fill in would be around $25 to $30 where the full acrylic nails application is quoted somewhere around $45 to $50.
You should keep in mind that you pay at the salons for the time and not really the material cost. If you fill the acrylic nails yourself at home, the variable cost would only be around $2 to $5 per session. Thus, you can save good money choosing to fill your acrylic nails yourself and cut down the salon bills by over 90%.
In U.S.A., following are the indicative prices:
| Nail salon category | Cost of acrylics full set (USD) | Cost of acrylic fill-ins (USD) |
|---|---|---|
| Cheap or budget nail salons | $25 to $30 | $15 to $20 |
| Mid level salons | $40 to $50 | $25 to 30 |
| High end salons | $65 to $75 | $45 to $55 |
How much is a fill in for nails at the salons depends on following:
1. Add-ons:
If you top up your acrylic nails with shellac, ombre shaping, gel paint, glitter nail art or similar add-one, then price will certainly go up.
Expect to pay following prices at mid-level nail salons:
- Basic acrylic nails fill job for hands (would typically be higher for toes): $25
- Shellac add on: $5 to $10
- Gel top coat paint add on: $5 to $10
- Ombre acrylic nails shaping: $10 to $15
- Glitter, crystals, sparkles or custom nail art: $5 to $25+ depending upon time involved in customs designs and setups
2. Repairs needed at time of infills:
It is hard to imagine that all your 10 acrylic nails would be in perfect shape and condition at time infills become due. Most likely, one or couple of them could have broken down due to accidental damage, lifted away or simply fallen off due to lack of sufficient glue.
The salons would normally repair one or couple of damaged tips for no additional charges as part of infills. However, if you need additional repairs, the overall time in infills goes up and additional charges become unavoidable.
The normal prices for repair of damaged acrylic tips is around $3 to $5 per tip beyond free of cost repairs for 1 to 2 tips included within base cost of infills package.
If you require many repairs, it may actually be better to go for full sets package as base infills cost and additional repair charges may not justify the cost. Therefore, do compare the full sets package cost with base infills and any additional charges.
3. Undoing the existing designs or nail paint
In some cases, it may take considerable time for the nail technicians to do acrylic infills. This is particularly, if your existing design or nail paint is hard to be removed and require longer buffing. For instance, if you have gel top coat, it needs to be manually filed with a buffer or e-file/ drilling kit, before gaps can be filled and finally the whole nail be repainted.
The overall process of undoing existing designs/ paint and doing it again may require the technician to spend actually longer time than doing the full sets again. The cost would naturally be higher in such cases.
4. Frequency of visits:
The nail salons and technicians operate their businesses to make money, right?
In the services industry, the objective is to maintain standard revenue per hour incurred or invested for each client. Therefore, more time you spend at a nail salon, higher would be the revenue for salon in absolute terms. Thus, they will be able to give you a quantity discount and play on economies of scale, as you are a high paying customer.
In simple terms, if you frequently visit a salon for periodic infills, re-balancing or buffing, your nails would remain in much better shape and require lesser time for periodic infills as compared to someone getting infills at much longer intervals.
Illustration:
If you get five infills during 3 months, the nail salon may want to earn around $100 for maintaining your nails for 3 months, and thus $20 for each visit/ infill.
However, if you get infills done only 3 times in 3 months, the technician will need to spend much longer time for each infill session and end up spending roughly the same time as in former case.
Since job charges basis time spent is standard revenue model in service industry, the nail salon may charge you higher around $30 to $35 for each visit in second case.
5. Packages and discounting models in nail art industry:
Going with above theory of time-based billing, nail salons typically provide packages with discounted rates. The package may provide fixed number of infills or repairs or re-balancing sessions valid for a certain time only.
The idea behind such package is that if you frequently visit, your nails will require much lesser time to refill and repair upon each visit. Thus, overall revenue per hour incurred by salon remains the same, if you had not opted for package and visited lesser number of times during same period.
Well, it is a win-win situation for both the salon and you (customer), as follows:
- The salon has a regular client who gives almost same revenue for each hour of time spent as compared to other customers not opting for a package.
- As a customer, you are able to maintain nails much better by frequent infills and repairs. Thus, you can immensely cut down the time with broken tips and outgrown nail gaps when you are probably hiding your nails. The satisfaction of discount prices is always a cherry on top.
6. Additional services:
If you generally opt for additional services (such as pedicure) at the nail salon, the salons would be willing to give you additional discounts. As a regular customer, it is obvious to expect discounts for volumes of business that you generate for the salon.
7. Other likely factors:
There could be different reasons why a nail salon could be willing to charge varying prices. For example:
- Higher price for unique designs and nail art
- Discounted price if the salon wants to try out new designs, nail supplies (it is common to expect heavily discounted prices if the salon is trying a new brand of acrylic liquid and powder, possibly procured as a sample product)
- Nail salon may want to upload your pic to build portfolio on their website or social handle. Yes, they will be willing to discount the price as they get promotion material from their own customers.
There could be several other factors which impact how much is a fill in for nails going to cost. Just be aware and do not hesitate to ask for discounts as a customer. They are common in nail art industry and you can make a good bargain most of the times.
Conclusion on acrylic fill in vs full sets
If you prefer to get your nails done at a salon, estimate the time required for infills vs full sets. The charges for job would also vary accordingly.
If you have simple design and nail paint (no gel or hard material) on acrylics with minimal repairs needed, it would be convenient and budget friendly to get the infills done instead of full sets.
However, if you have complex design or hard paints like gel, which need to be manually removed before infills, the salon may charge additional for extra effort needed. In addition, too many repairs will increase the cost of infills, thus going with full set in such a case could be much better option.
A good strategy would be to bargain a package for infills and rebalancing jobs with a decent expiry time. For instance, you could get a 2 months package for just $100 that entitles your for five infills sessions at a mid-level nail salon. Frequent infills session at discounted prices will help you maintain acrylic nails in a much better condition at all times and at a pocket friendly pricing as well.
Frequent infill sessions with lesser time spent during each visit will yield much better results than lower number of visits with higher time spent per session. Get the most out of each penny you spend at a salon!
How often do acrylic nails need to be filled?
Typically, you will need acrylic infills once in 2 weeks. While you may stretch that between 3 to 4 weeks, outgrown nail gaps (with no acrylic) and lifted acrylic nail is likely to be prominent during the intervals.
The infills intervals would mainly depend upon nail growth rate that differ from person to person. The average growth rate of fingernails is around 3.47 millimeters per month and that means you will have around 2 millimeters of nail growth in around 2 weeks to 20 days. That much of growth is sufficient to leave a noticeable gap between cuticle and acrylic nail, and that is when you should do an acrylic infill.
In most cases, do not stretch infills session beyond 3 weeks
Delaying infills (or re-balancing) will definitely be a spoiler of acrylic nails fun and beauty due to wide gaps and lifting of acrylic nails. In addition, this delay may cause damage to your natural nails, increase the chances of breakage and make your acrylics fragile.
If you do not want to spend too much on frequent infills, consider doing them at your own. It is quite simple, fun and doable at home, if you have the basic acrylic nail art supplies with you. Refer easy do-it-yourself guide on acrylic refills above.
How infills delay can cause problems for you
- When you do the acrylics on your natural nails, the thickest part of acrylic is generally applied towards the widest part of your natural nail i.e. towards the top of nail. This area is located between middle point and the free edge of natural nail, commonly known as “stress area”. The strength of acrylic nail rests upon this stress area as it takes the overall weight of extensions used on natural nail.
- As your nail grows, the thickest part of acrylic moves upward towards the tip of your nail and forming part of free edge. This causes an imbalance in acrylic nail setup as the stress area that supports the thickest part (or backbone) of acrylic nail extension is no longer strong enough to support it.
- The shifting of stress area can cause acrylic nail to lift and the fake nail becomes highly exposed to damage or breakage. Thus, if you do not restore the balance by doing the infills at proper intervals, you are likely to damage your acrylic nails.
- In addition, the imbalance caused due to above shifting would create burden on the tip. This can cause heavy strain on the nail matrix where nail cells generate. Thus, damaging the formation of your natural nails.
There are lots of discussion around that acrylic nails are harmful for your natural nails. That is not true if you upkeep them well and maintain the balance with your natural nails. Getting acrylic infills or refills or re-balancing on time is critical to maintain this healthy balance and safely use acrylic nail extensions for longer duration.
How many times can you get your nails filled?
You can get your acrylic nails filled in indefinitely and there is no reason why you should replace them with new set unless they are lifted, damaged or you just want a new shape. 8 to 10 infills are common before majority of the folk would want to have full replacement.
If you maintain the acrylics well enough by getting regular infills every 2 to 3 weeks, your existing acrylic set should perform flawlessly for 5 to 6 months. Even beyond that, it should be just fine to continue with same set if there are no balancing issues.
However, it is a good idea to replace the set after 5 to 6 months to make sure everything beneath the false nail is in good shape.
Number of acrylic infills before complete set replacement would depend on following:
1. Tips versus sculpted nails:
If you have acrylic nails set with tips (which is more common and safer method), then probably after 3 to 4 months, your nails would have outgrown that the tip no longer has support of nail plate and completely rests as free edge.
At such times, you are likely to witness imbalance of acrylic nails. This imbalance is likely to cause an uplift due to weaker support from base nail. Sudden lifting of tips can cause breaking damage to your natural nail and yes, that is painful.
If there is no damage and you got regular infills, you may just let the tips grow with natural nails. Filing and buffing with each infill will eventually have the tip filed completely leaving just your natural nails with acrylic over it, more like what sculpted nails are done.
In case of sculpted nails, you may go on with regular infills for a long time. It is possible to continue the same set for even more than a year. Beyond that, it is hard to imagine that you will not want a makeover and swap the existing set with new design and shape.
However, sculpted nails have their own fails, more expensive and difficult to maintain. Having sculpted nails just for longer life and more infills should be the last thing on your mind. It takes almost the same time and cost to replace existing acrylic tips with new ones. It could even be cheaper and faster than periodic infills, balancing and shaping needed for sculpted nails.
2. Damaged or lifted nails
If you experience lifting of nails or frequent damages that you need replacement of several tips, then it may just be a good idea to have the whole set replaced.
Why? Because it would be much quicker to just soak them off and redo the fresh sets rather than manually buffing few nails for infills and repairing the tips on others.
3. Time required for infills vs fresh set
In case you have shellac or hard gels that need manual buffing (much faster with an e-file or drill), soaking them off for fresh sets is much faster.
The rule of thumb is to re-balance the acrylics as faster as you can. Therefore, if doing an infill is more time consuming; why not consider a fresh set? The difference in material cost is negligible in infills vs full set, so that should not be the deciding factor anyway.
4. Swapping design and shape
Do you love changing your nail design and shape often? From coffin shaped to French nails or almond shaped nails to ombre nails.
Reshaping the nails during infills is possible but take longer time and could be tedious task. The easier alternative would be just to soak them off and use fresh pre-shaped tips (coffin, almond or whatever shape you prefer) that need minimal filing and buffing.
5. Natural nails growth strategy
If you a nail biter and find it difficult to grow nails, then acrylic nails is probably the best fit. You will not want to bite the acrylic for sure and thus your natural nails underneath will find the room to grow.
Eventually natural nail growth will push the tip glued over it completely towards free edge. Over time, false tip is completely filed out with each acrylic infill session. You are likely to have long grown natural nails by then.
Acrylic nails (based on tips) with regular infills over few months could be a good strategy to get rid of your nail biting habit. This will also let your nails grow long naturally over time.
How to fill in acrylic nails without acrylic
Doing an infill with acrylic is the best way to do it. That is clean, safe and balances the fake nails on your natural ones perfectly.
However, for various reasons such as lack of time or budget to visit a salon or reluctance of doing infill at home, you may try to fill in acrylic nails without using acrylic.
The initial steps are similar to do an acrylic infill (without acrylic):
- Take off the old nail paint using non-acetone nail polish remover or using an electric nail kit.
- Then, buff the excess acrylic to reduce the lifting of acrylic nail towards the bottom and make it blend with your natural nail. Do not over buff the acrylic that there is hardly any left on the nail.
- Apply dehydrator to eliminate any excess oil or moisture left on the nail bed. Top it up with few coats of primer to prevent stains and any chemical reactions with nail paint.
- Now, just apply the nail paint over the entire nail including the natural nail gap (between cuticle and acrylic nail) and the acrylic nail surface itself.
- Finish with a top coat. If you neatly buffed the acrylic to blend it with natural nail toward the base, nail lifting should be hardly visible.
That’s how you can easily disguise grown out nails without a full blown acrylic fill in.
The below video explains on how you can fill nails without acrylic
Warning: You should fill acrylic nails without acrylic by buffing and repainting the entire nail only as a temporary measure or if the outgrown nail gap is minute.
Please note acrylic infill has an important objective of restoring the balance between false nail and natural nail bed.
If you simply hide the outgrown gap with nail paint, then acrylic base will become weaker and stress area (which supports false nail) will move upwards towards the tip. This can cause your acrylic nail to lift or even increase chances of breakage damage to your natural nail.
Therefore, it is strongly advised not to disguise the gaps with just paint on a regular basis. Always consider filling the false nails with acrylic as a healthy and safer practice.
If you are determined of not using acrylic for nail fill-ins, then instead of disguising the outgrown natural nail by paint, use a nail filler. That could be a better way to do it instead of disguising through nail paint.
Fill acrylic nails with gel polish instead of acrylic
If you prefer to disguise the outgrown nails using nail paint, then you may try using a gel polish instead of regular paint. Gel polish is slightly ticker than regular lacquers and would do cover the gaps much efficiently than regular polish.
You will not notice a sudden bump around the area where false nail meets the outgrown natural nail bed. You may not need to buff and file the acrylic nail a lot so that it blends completely with natural nail base. A couple of coats of gel polish are thick enough to cover the lifting.
Thus, you can fill in acrylic nails with gel polish causing lesser risks as compared to regular nail paint. However, remember that gel polish on acrylic nails is not the best combination as the overall pressure on your nail increases due to multiple thick layers (of acrylic and then gel).
Filling your outgrown acrylic nails using acrylic (powder and liquid mixture) remains the best and safest way to continue wearing false nails without replacing with fresh full sets.
Conclusion
Doing an acrylic nail fill is extremely easy and not as complicated as doing a fresh full acrylic nails set. You do not need to work with glue, tips placement and shaping the whole nail. Within 30 to 40 minutes, you can easily fill your acrylic nails at home without burning a hole in your pocket.
The cost of doing an acrylic infill yourself at home would be negligible as compared to getting it done from a salon. This will allow you to do have frequent filling sessions at home (like every 2 weeks) without breaking your budget.
Regular and frequent fills will keep your acrylic nails healthy and you do not need to hide the annoying gaps or lifting. Not only your acrylic nails will last longer, there would be minimal chance of damage of natural nails and your nails will look freshly done at almost all times.
Frequently Asked Questions
1. Can you refill shellac nails?
Yes, you can refill shellac nails to fill the gaps and treat lifting of shellac. If you wear shellac over acrylic base, the process remains same as you infill the acrylic nails. However, you will need to remove shellac for doing the infills and then repaint.
Being a strong and tough paint, manually buffing down the shellac may take some time. Use an electric drill to quicken the process.
2. Can you get an acrylic fill on gel nails?
Theoretically, you can fill the gel nails with acrylic. Once you refill the gaps with acrylic, the entire base can be repainted with gel polish to restore the balance and fresh look.
However, this should only be used as a temporary measure where you are unable to fill the nails yourself with gel. Acrylic and gel should generally be avoided together since both being heavy material may heavily strain your natural nail plate.
As an ideal practice, fill your acrylic nails with acrylic and the gel nails with gel to ensure safe and healthy nail art.
3. What does fill in mean at a nail salon?
Nails fill in services at nail salon mean re-balancing of your nail extensions (such as acrylic nails). In around 2 to 3 weeks, your nails are likely to have grown out that there would be a visible gap between your cuticle and nail paint or false nail.
This gap is filled in with acrylic (or other material depending upon type of extensions used) and any lifting of the false nail is treated. This saves you from replacing the entire set and your nails get a fresh look as they stood on day one.
4. Can you fill acrylic nails with polygel?
Polygel can used to create nail extensions and in fact emerging as an alternative to acrylic in the nail art industry. However, polygel is much lighter than acrylic and thus if you have acrylic nails, then using polygel to fill the gaps may not be the best idea.
Filling the gaps has another important objective of restoring the balance between acrylic and the natural nail. Using lighter material like polygel may not help towards achieving this objective and thus not an ideal choice for acrylic nails infills.
5. Can you change nail color when getting a fill?
Yes, when you fill your acrylic nails or any other kind of artificial nails, you can change the nail color. In most cases, you will need to remove the old nail paint completely before you can fill outgrown nail gap.
Once the gap is refilled and acrylic nail is rebalanced, you should be able to change the nail paint color or design as if you got a completely new set. There is no strict requirement that you need to use the same color used for painting the original set.
6. Can you get acrylic nails shortened during a fill?
Yes, the acrylic nails can be filed and buffed to alter their shape and size when you fill the outgrown gaps. In fact, most likely you would need to trim down the nail tips when you have an infill.
This is the perfect time to reduce the nail length before you repaint them with a new lacquer and seal.
7. Can you get acrylic nails filled if they are not grown out much?
It is ideal to have an infill in around 2 weeks of time when there is a visible outgrown nail gap between your cuticle and acrylic nail. However, if you want an infill before that duration when your nails have not grown much, it should still be fine and cause no issues.
You may particularly want the filling if your acrylic nail has chipped or lifted. There are literally no timing restrictions for re-balancing or repair of acrylic nails.
Still have doubts? If you any help or clarification on acrylic nails infills, feel free to ask us below 🙂
On step one you mention soaking the nails- this is unadvisable with acrylics or gels because it adds moisture to the nail and causes the nail to swell, and acrylic to adhere improperly and lift. Many salons are even ditching soaking nails with procedures like a regular manicure because it can cause nail polish to lift and damage to the nails (wet nails are soft and more prone to damage.) Also nail bowls and brushes can be hard to disinfect or expensive to replace (nail brushes) with each client.
I going to get my nails done tomorrow
Is there a “kit” of some sort that we can purchase all supplies to do this in an emergency (like quarantines because of a pandemic)?
I brought Mia Secrets kit, and Melodysusie nail drill. Being that salon is closed had to do something. Hope this helps.